


Tummy tuck surgery—abdominoplasty—does far more than “trim a belly.” For the right candidate, it can tighten separated abdominal muscles, remove excess skin, reshape the waist, and restore confidence after pregnancy, aging, or weight change. But there isn’t just one tummy tuck; there are different types of tummy tucks. Surgeons tailor techniques to the tissue thickness and laxity, as well as the location of looseness (above or below the navel, around the flanks, or the entire torso), and consider how much downtime and scarring you can tolerate. That’s why two people with “the same problem” may need different operations.
This guide breaks down the different types of tummy tucks in plain language, explains how surgeons choose among them, and outlines a realistic recovery timeline so you can plan work, childcare, and travel accordingly. It also outlines candidacy, risks, and how to vet a surgeon—key steps to a safe, natural‑looking result. This isn’t a substitute for a consultation; it’s a framework for the right questions. If you’re early in your research or comparing quotes and techniques, the details below will help you interpret photos, proposals, and consent forms.
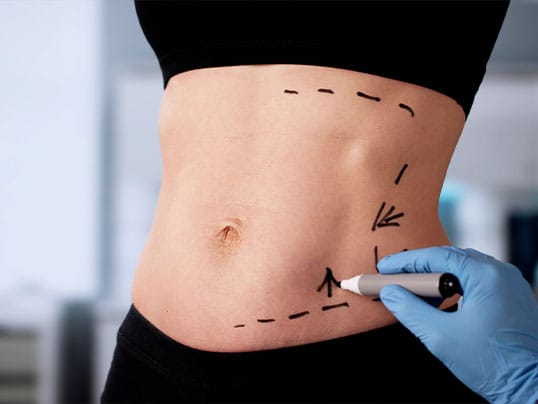
Tummy Tuck Options
From subtle refinements to comprehensive reshaping, abdominoplasty isn’t a single operation but a family of techniques tailored to your anatomy, goals, and tolerance for scars, downtime, and cost. Here’s how the different types of tummy tucks compare.
1) Mini tummy tuck (mini abdominoplasty). It’s best for people with a mild lower‑belly pooch, minimal skin laxity above the navel, and little to no muscle separation. The incision is shorter than a C‑section scar and stays low along the bikini line. Surgeons remove a narrow strip of loose skin below the belly button, tighten the lower rectus muscles if necessary, and may also perform liposuction. The navel isn’t moved. Recovery is faster and discomfort is lighter than with other versions, but results are limited to the lower abdomen; upper-abdominal bulges or stretch marks above the navel won’t improve.
2) Full or standard tummy tuck. This is the workhorse procedure for individuals who have undergone pregnancy or experienced weight fluctuations. It addresses moderate to significant laxity above and below the navel and often repairs separated rectus muscles (diastasis). The incision runs hip to hip, placed low for concealment, and a second incision around the navel allows repositioning. Excess skin and fat are removed, muscles are tightened, and flank liposuction can enhance contour. Expect predictable abdominal flattening with a balanced waistline.
3) Extended tummy tuck. For individuals with loose skin that extends onto the flanks and lower back, the incision is lengthened beyond the hipbones. It cinches the waist and smooths “muffin‑top” rolls while flattening the front. It’s common after significant weight loss or multiple pregnancies. Recovery is similar to a full tuck but may feel tighter along the sides.
4) Circumferential body lift (belt lipectomy). This 360‑degree operation treats the abdomen, outer thighs, and buttocks, lifting the entire lower trunk. It’s primarily used after massive weight loss. Scars circle the body, and recovery is longer, but it offers the most dramatic reshaping of the waistline and back rolls.
5) Fleur‑de‑lis abdominoplasty. When there’s substantial horizontal and vertical laxity (often after bariatric weight loss), surgeons add a vertical incision along the midline in addition to the low horizontal scar. This allows for the removal of skin in two directions and can produce a flatter, tighter midsection in people who would otherwise have a boxy appearance. The trade‑off is a visible midline scar.
6) Reverse tummy tuck. If loose skin and fullness are primarily located in the upper abdomen, a reverse approach lifts tissue upward through incisions hidden in the breast crease, often in conjunction with breast surgery. It’s less common but useful in select patients.
Technique Nuances in Tummy Tuck Procedures
Many surgeons combine liposuction with abdominoplasty (also known as lipoabdominoplasty) to achieve more defined results while preserving blood flow. Scar placement, umbilical shape, and muscle‑repair strength vary—review before-and-after photos and discuss what matters most to you.
Are You a Candidate for a Tummy Tuck?
Abdominoplasty suits individuals whose primary concern is loose, excess skin and diastasis recti after pregnancy or significant weight change—not those seeking weight loss. The best candidates are at a stable weight for at least six months, within a healthy BMI range for surgery, nonsmokers or willing to quit well in advance, and free of uncontrolled conditions that impair healing. You should be finished having children, as future pregnancies can cause the separation of muscles and stretching of skin again. Realistic expectations matter: a tummy tuck improves contour, not overall body fat or digestive symptoms. If your main issue is internal visceral fat, lifestyle changes or bariatric options may be better than abdominoplasty.
Recovery Timeline After a Tummy Tuck Procedure
Every recovery is individual, but most board-certified plastic surgeons align on the mileposts below. Your plan depends on the extent of the surgery, whether you underwent muscle repair, the use of drains, and your baseline health.
Days 0–2: Expect tightness, soreness, and a flexed posture to avoid tension on the incision. You’ll wear a compression garment and, if placed, surgical drains. Take short, frequent walks to reduce your risk of blood clots. Sleep semi‑reclined. Take prescribed pain medication and a stool softener; hydration and protein aid healing.

Days 3–7: Swelling and bruising often peak mid‑week, then begin to settle. Continue gentle walking, deep breathing, and lymphatic massage if recommended. Most people shower once drains have minimal output or after dressings are changed. Avoid lifting more than a grocery bag. Many return to desk work at the end of week one.
Weeks 2–3: Drains, if used, are often removed between week 1 and week 2 as output declines. Many are also off pain medications and doing light household tasks, including driving, around this time frame. Your Inspire Aesthetics surgeon will also provide a specific garment protocol to help speed recovery and enhance results. Silicone sheets or scar gel can be applied once the incisions are sealed and your surgeon has approved. Itching along the incision is normal; numbness can persist for months.
Weeks 4–6: Swelling continues to recede, and energy improves. Many surgeons allow stationary cycling, brisk walking, and light upper‑body training that doesn’t engage the core. If your job is active, this may be the earliest return. Continue compression per your surgeon’s protocol. Driving is safe once you’re off narcotics and can brake firmly.
Weeks 8–12: With surgeon clearance, patients gradually reintroduce core work and heavier lifting. Expect intermittent tightness or a “pulling” sensation with stretching; it will fade. Most residual swelling is subtle by three months, and the waistline looks more defined. It’s common to feel “not quite yourself” until around the 10–12 week mark.
Months 6–12: Final contour and scar maturation evolve over the first year. Scars flatten and fade from red to pink to pale; strict sun protection prevents darkening. Minor lumps from internal sutures and residual swelling typically resolve. If a small seroma or dog‑ear persists, touch‑ups are often addressed after six months.
Contact your surgeon immediately if you experience fever, calf pain, sudden asymmetry, spreading redness, foul drainage, or shortness of breath. Follow your exact instructions—they overrule general timelines.
Travel and life admin: Short car rides are okay within a week. Wait 3-4 weeks for long flights to reduce the risk of blood clots. Many patients wear compression for 4–8 weeks. Alcohol, nicotine, and vaping slow healing—avoid them until cleared. Expect numbness to improve gradually over a period of up to a year.
Tummy Tuck Risks and Safety Protocols
All surgery carries risk. With tummy tucks, key complications to discuss include bleeding, infection, wound separation, seroma (fluid collection), poor scarring or keloids, numbness, asymmetry, delayed healing (higher in smokers and people with diabetes), blood clots, and anesthesia complications. The risk of venous thromboembolism is real; ask about your personal risk score, mobility plan, compression devices, and whether you’ll receive blood thinners. Combining large-volume liposuction with extensive abdominoplasty can increase these risks. That is why some surgeons stage procedures to enhance safety. Choose an operation that matches your health profile, not just your desired outcome. Follow pre‑op instructions on smoking, medications, and supplements; after surgery, move early, meet protein goals, and keep all follow‑ups.
How to Choose a Surgeon and Set Expectations for a Tummy Tuck
- Training and credentials: Look for a board‑certified plastic surgeon operating in an accredited facility with anesthesia professionals.
- Portfolio fit: Review dozens of before‑and‑afters of bodies like yours. Study belly‑button shape, scar placement, and waistline balance—not just “flatness.”
- Plan transparency: Ask which technique among the different types of tummy tucks is recommended, whether diastasis repair and liposuction are included, the drain strategy, VTE prevention measures, scar care instructions, and the revision policy.
- Communication: A good surgeon explains trade‑offs, uses precise measurements, and welcomes your questions. You should feel heard, not sold.
Preparation for a Tummy Tuck
Reach a stable weight, maintain good nutrition, stop nicotine, optimize medical conditions, and arrange two weeks of practical support at home. Great outcomes start before the OR.

Written by: Dr. Daniel Crane
Board-Certified Plastic Surgeon, Inspire Aesthetics
About Dr. Crane


